Right now I’m competing in a competition called Creating with the Stars and this breakfast bar was our entry for Round 1.
It is one of my favorite projects to date and has transformed this space – it’s practical and completely changes the way we use this room. (check out the history of our foyer and before / afters of our hard wood floors!)

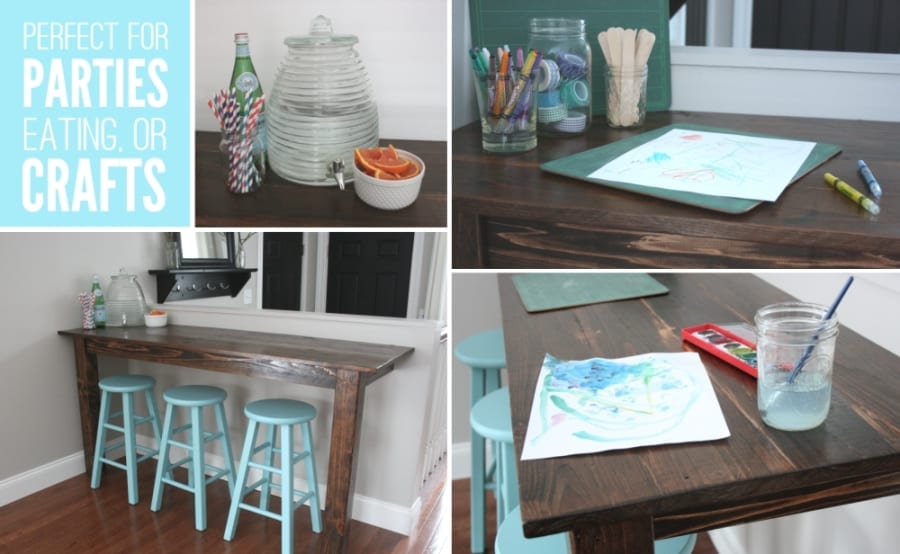
Lily and Ben love it because they can eat, color, paint, or play here without Adam getting into their stuff. I love it because it is right between the kitchen and the family room, and makes a perfect spot for eating “not-so-formal” meals.
We previously used this space for toy storage and sometimes we put the kids’ tiny table here, but it mostly the space was left blank and unloved.

The theme for Round 1 was “upcycled.” I had wanted a table here for a while, but never had a permanent solution.
I went into the basement to peek around and we hit the jackpot! 77 year old floor boards up in the rafters. They were tongue-and-groove type boards, previously used as the subfloor in our house, before being removed as part of an addition project completed by the previous owner:

We went through the boards, selected a few “good” ones, washed, and sanded them one night. Glued them together (using a thick coat of wood glue) and set up a heavy-duty clamping station another night:

We cut the length and width down to fit our space, then sanded the edges. Ideally you’d use a table saw, but if you only have a circular saw like us, you can clamp a 1×4 to the table to use as a straight-edge. We then applied two coats of Minwax stain in Provincial, and three coats of semi-gloss Minwax Clear Brushing Lacquer, and left it for 24 hrs to dry. Then it was time to put it all together – or for Doug to put it all together :)
Note: Do not use the clear coat in your house. We had it in the garage with the door open, but I could smell it from the other side of the house. And in our van the next day. You do need the clear coat, but be careful when using it and let it dry outside as long as you can.
Below is a layout of how it’s held together. All of this wood is 1x4s, cut to size. We used cedar because the stain applied similar to with table top, and cedar has some pretty sweet character – resembling that of the tabletop (Doug says it’s not as strong as some other woods, but it did the trick).

Before applying the wood, you want to draw it out first so you know the measurements and where everything goes. When actually connecting the wood, we applied glue to the wood, put it in place, clamped it down, then drilled screws into the tabletop. It helps if you pre-drill the holes. We used a Kreg Jig I won at a conference and it was awesome. Couldn’t have done this project as nicely without it.
Two hanger bolts on each leg (four total) secure the 4×4 cedar post legs to the table top.

And the whole thing was secured to the wall in several places because there were a ton of studs in this tiny wall. It was like one big stud party up in here (insert overused stud finder jokes).
Some of the stools were on Freecycle, some were the 23” ones at Walmart for $15. I painted all four to match each other, the color is semi-gloss Martha Stewart wall paint in “Lagoon”.

Then I scrambled to stage it all with fun stuff but still be secretive for the competition.
But forget staging. The best pictures of this table are those with our family enjoying it. :)


Now that I think of it, this was our first time building a piece of furniture and I’m pretty excited! It is super sturdy, looks like something out of Pottery Barn, but cost less than $40 to build.
Need a reminder of how gross this room used to look? (TONS of awesome before and afters in this post)


And enough people liked it so we’re on to Round 2 of Creating with the Stars! To vote, click here – I need you to help me move onto Round 3!!!
So, what do you think?
And when are you coming over to hang out and eat in our new spot!? ;)


